

Custom dropdown select with CSS and JS
Create custom select dropdown using CSS and JavaScript


Table of contents
Hi!
Recently I had a task to create custom select dropdown. First thing that came to my mind is to use select tag with options, but this approach was not so good.
This is why I decided to write it down here.
Select tag testing
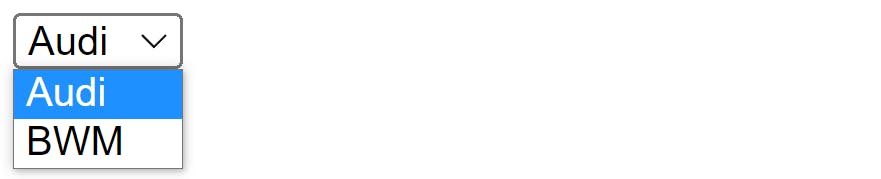
First lets check what we can achieve using select tag.
<select name="schoosecar" id="schoosecar">
    <option value="Audi">Audi</option>
    <option value="BMW">BWM</option>
  </select>
Tag without styling will look like this.
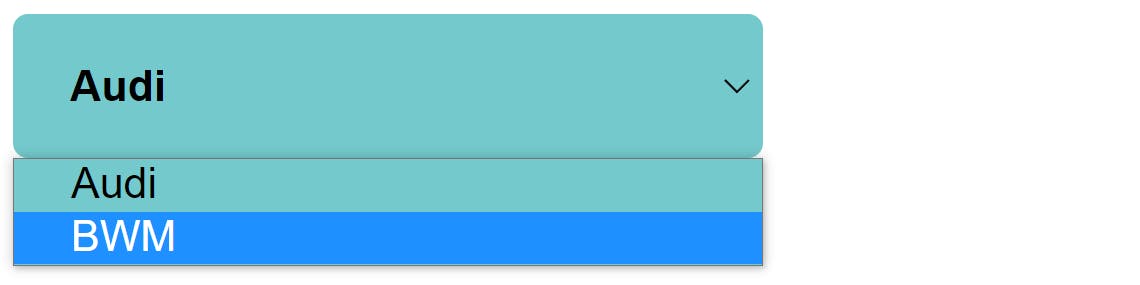
Lets say that the design requires rounded corners and background color.
We can easily add styles to select tag but the problem starts with the dropdown list.
select#schoosecar{
  width: 250px;
  background-color: #74c9cc;
  color: #000;
  border:none;
  border-radius: 5px;
  padding: 15px 15px;
  cursor: pointer;
  font-weight: 700;
  font-size: 0.9rem;
}
As you can see our list got new color, but there is no way to style options elements. Also the problem will be with our dropdown arrow, we ca remove it but not style it. At least I did not find a way to do this with only CSS and JS.
So what I found it is common practice to use list elements and style it according to our needs.
As I found bootstrap also uses this technique for dropdown lists.
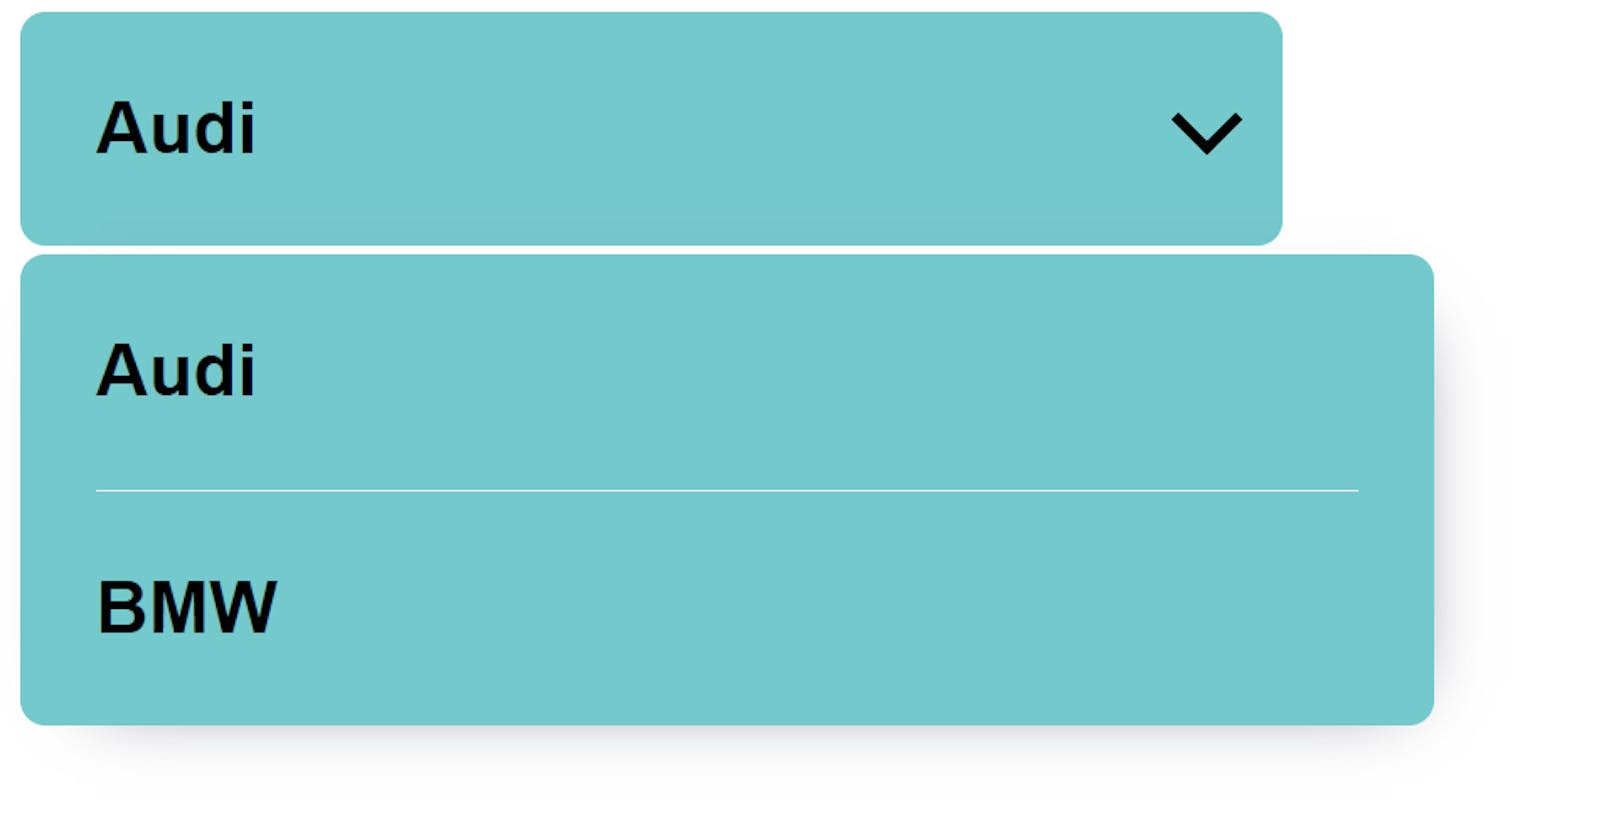
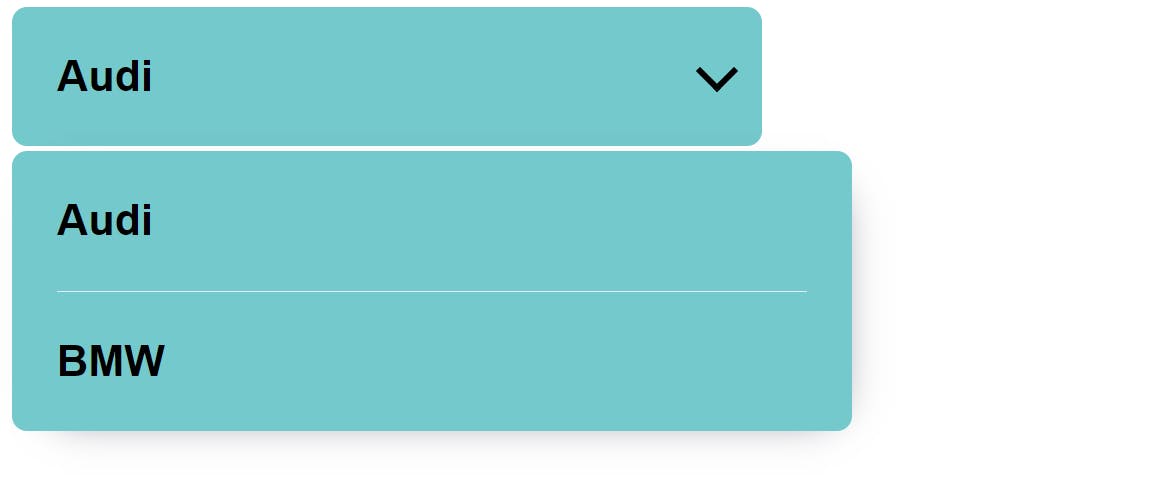
Custom select
HTML
For this we will need container with span element as our choice, and list for our options.
<div class="dropdown">
    <div class="select">
      <span class="selected">Audi<i class="arrow down"></i></span>
    </div>
    <ul class="dropdown-list">
      <li>Audi</li>
      <li>BMW</li>
    </ul>
  </div>
Here we need to add a bit more styles for this to look as we please but we can do whatever we want.
I wanted my dropdown list to look like select div, so rounded corners and same spacings.
CSS
.dropdown{
  width: 250px;
  position: relative;
  margin: 5px 0;
  font-family: Arial, Helvetica, sans-serif;
}
.select{
  background-color: #74c9cc;
  color: #000;
  display: flex;
  justify-content: space-between;
  align-items: center;
  border:none;
  border-radius: 5px;
  padding: 15px 15px;
  cursor: pointer;
  font-weight: 700;
  font-size: 0.9rem;
}
.dropdown-list{
  position: absolute;
  list-style: none;
  background-color: #74c9cc;
  border-radius: 5px;
  width: 100%;
  top: 2rem;
  padding: 0 15px;
  z-index: 1;
  display: none;
  box-shadow: 4px 4px 15px -11px rgba(66, 68, 90, 1);
}
.dropdown-list li{
  padding: 15px 0;
  font-weight: 700;
  font-size: 0.9rem;
  cursor: pointer;
}
.dropdown-list li:first-child{
  border-bottom: 0.5px solid #e5e9f2;
}
.dropdown-list li:hover{
  opacity: 0.9;
}
.dropdown-list-open{
  display: block;
}
.arrow {
  position: absolute;
  right: 10px;
  top: 35%;
  border: solid black;
  border-width: 0 2px 2px 0;
  display: inline-block;
  padding: 4px;
}
.down {
  transform: rotate(45deg);
  -webkit-transform: rotate(45deg);
}
JS
As a last step we also need to add some JS code for our dropdown to work properly.
First we need to target all elements.
Next we add event listener to check when user clicks on our dropdown. When user clicks then we show/hide our dropdown list.
Lastly we need to loop through our options list and listen for user clicks there. When user click on one option, we swap our display text to new text that user clicked.
const dropdown = document.querySelector('.dropdown') //point to dropdown
const dropdown_list = document.querySelector('.dropdown-list') //point to list of dropdown options
const options = document.querySelectorAll('.dropdown-list li') //point to all dropdown options elements
const selected = document.querySelector('.selected') //point to current display option


// listen for dropdown click and open/close list
dropdown.addEventListener('click', ()=>{
  dropdown_list.classList.toggle('dropdown-list-open')
})

// display choosed option in display container
options.forEach(option => {
  option.addEventListener('click', () => {
    selected.innerHTML = option.innerHTML  + `<i class="arrow down"></i>`
  })
})
And we should have now working dropdown list.
If you find any mistakes or you have ideas how to refactor my solutions to be simpler/ better please let me know :)